Menu Planner

Meal Plans, Shopping Lists, Pantry, and Recipes all in one app

Settings Overview

iPad Settings
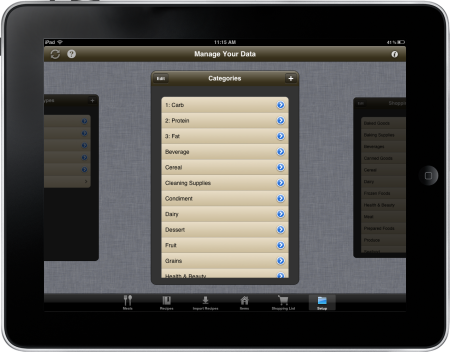
From this screen, you can:
  • Edit your data. All of the data that makes Menu Planner work can be accessed from the bottom of this screen. This provides an direct way to modify some of your data if you ever need to.
  • Remove an item from a list by tapping the "Edit" button.

Syncing

Syncing allows you to use the Menu Planner website from your computer and to sync your data between multiple devices. To get started, follow these steps:

  1. Tap the "Start Syncing" button.
  2. You'll be asked to enter your account information. If you don't have an account yet, enter the email address and password you'd like to use, and the account will be created for you.
  3. If this is the first time you've setup syncing for your account, the app will perform the initial sync and copy your data to the Menu Planner website. When it's done, you're all set.
  4. If you have synced with the account before, OR you have setup syncing on one device and are now setting it up on a different device, the app will ask if you want to keep the data already on the website or copy the data from your device over the website's data.
    • If you're just syncing to a second device, you'll want to use the website data. Choose "Restore from server".
    • If the device you're setting up syncing on has all the data you want, choose "Backup to Server". This will overwrite whatever data was already on the website with the data from your device.
  5. After the syncing is complete, you'll see the sync status screen, which shows you how many changes you have on your device that need to be sent to the website, and how many changes from the website need to be downloaded to your device.


Recipes Recipes Recipes